It’s very easy to take toilets and indoor plumbing for granted. They have made a huge difference in hygiene and cleanliness. You probably don’t even realize how much you take this appliance for granted until something happens to render it inoperable. One of these problems is leaking toilet tanks.
For those unfamiliar with the specific parts of a toilet, the tank is the large part above the toilet that most people might lean against when sitting on one. This part holds reserve water that’s used to flush away waste from the toilet bowl. You can now see how leaking toilet tanks can be a huge problem, so check out this guide to fixing leaking toilet tanks in this blog.
Your Guide To Fixing Leaking Toilet Tanks
As you have just learned, fixing leaking toilet tanks is essential if you want your toilet to have the right flushing power. However, before getting into fixing leaking toilet tanks, you’ll want to know what causes them. According to experts, leaking toilet tanks are usually the result of a worn-out spud washer, worn-out seals, or deteriorating gaskets at the tank bolts. With these causes in mind, here’s how to go about fixing leaking toilet tanks:
1. Determine The Source Of The Leak
Before getting started, inspect your toilet to determine the source of the leak. This inspection is also an opportunity to troubleshoot your toilet tank by tightening the tank bolts. If the leak persists after tightening these bolts, continue locating the leak. If it seems to be coming from the gasket, spud washer, and/or fill valve, proceed to the next step.
2. Turn Off The Water And Disconnect The Supply Valve
After obtaining the necessary equipment for the job, you’ll want to turn off the water and disconnect the supply valve from the toilet tank. Disconnecting the supply valve will ensure more water doesn’t try to get into the tank during this repair process.
3. Empty The Toilet Tank
After disconnecting the supply and turning off the water, you’ll need to empty the toilet tank. You’ll do this by flushing the water out, then sponging the inside of the tank until it’s dry.
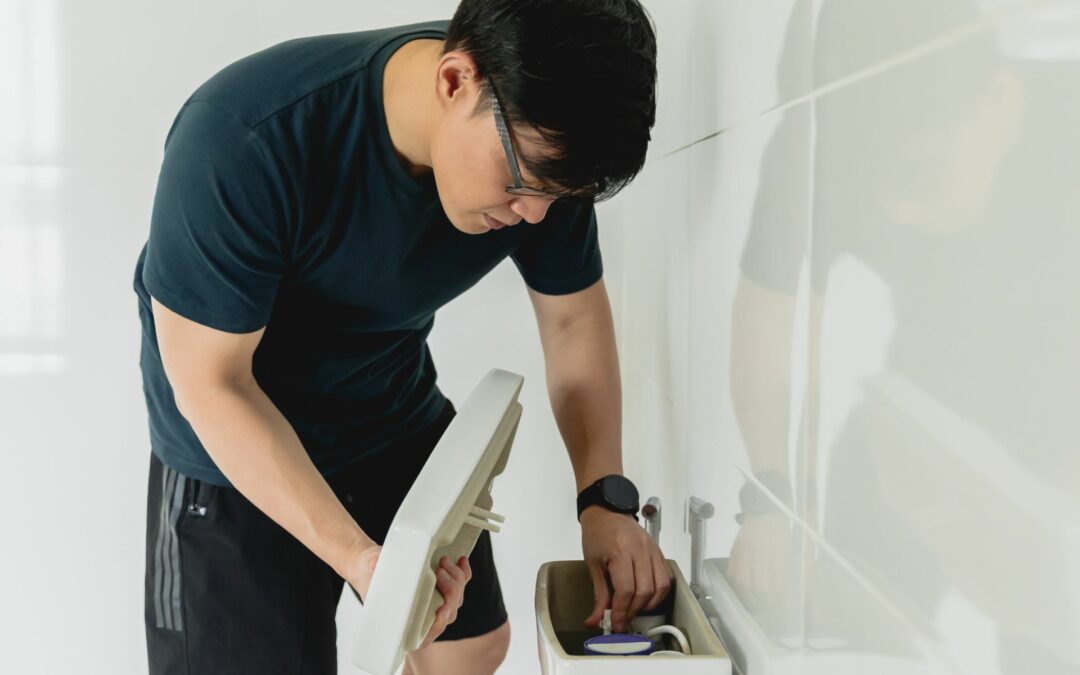
4. Remove The Tank Bolts, Gasket, And Tank
Using a wrench, pliers, or screwdriver, you’ll next remove the tank bolts, the gasket, and the toilet tank. You might need to use a mini hacksaw if the bolts are too rusty, so have some replacement bolts on standby. After removing these parts, you can address the source of the leak.
5. Replace The Gasket, Fill Valve, And/Or Spud Washer
If you’re fixing a leaking toilet tank, one of the culprits could be a worn-out gasket or seal. With a replacement kit, you can replace the gasket. That same kit will have specific guidelines for the process. As for the fill valve, you’ll need a wrench to remove the old one and use the manual to replace it. Finally, you’ll lay down the tank to replace the spud washer according to the manual guidelines.
6. Reinstall And Test The Toilet Tank
After all the repairs are complete, carefully reinstall the toilet tank. Once the tank is reinstalled, flush the toilet and see if it still leaks. If it’s no longer leaking, then you have successfully completed the process required for fixing leaking toilet tanks.

Call ASAP Plumbing Experts For Help!
We hope this guide to fixing leaking toilet tanks will make your life easier. If, however, none of these tricks work and your toilet tank still leaks, you’ll need to reach out to a professional to solve the problem. Luckily, if you live in Houston, you have access to our team at ASAP Plumbing Experts. Contact us today and get your toilet back in shape.