
Getting Rid of Your Old Tub
If you’re thinking about replacing your old bathtub, one of the first steps is getting rid of the old one. While this may seem like a daunting task, it can actually be quite straightforward with the right tools and a little bit of know-how.
Before you begin, make sure you have a plan for disposing of the old tub. Check with your local waste management facility to see if they offer special pickup services for large items like bathtubs. If not, you may need to rent a dumpster or hire a professional junk removal service to handle the removal for you. Remember to take measurements of the old tub before you begin the process, as this will be helpful when it comes time to install the new one. Once you have a plan in place, you can start the process of removing the old bathtub.
Once you have a plan for disposing of the old tub, you can start the removal process. Begin by disconnecting any plumbing fixtures that are attached to the tub. This may include the faucet, showerhead, and drain. Use a wrench or pliers to loosen the connections and carefully remove the fixtures. Be sure to have a bucket or container handy to catch any water that may be in the pipes.
After the fixtures are disconnected, you can move on to removing the tub itself. This may involve cutting through any caulk or adhesive that is holding the tub in place. Depending on the type of tub and its installation, you may need to use a pry bar or sledgehammer to carefully break up the tub and remove it in pieces. Take caution to avoid damaging surrounding walls or flooring during this process. It may also be helpful to have a helper or two to assist with lifting and carrying the pieces of the tub out of the bathroom.
Things to Consider Before Starting the Replacement
When it comes to replacing your old bathtub, there are a few essential things to consider before getting started. First and foremost, you’ll need to determine your budget for the project. Bathtub replacements can vary widely in cost, so it’s important to have a clear idea of how much you’re willing to spend. In addition to the cost of the new bathtub itself, you’ll also need to factor in the cost of installation, any additional plumbing work that may be required, and any necessary materials or tools.
Secondly, you’ll need to think about the size and style of bathtub that will work best in your bathroom. Consider the overall layout and dimensions of the space, as well as any existing fixtures or features that may impact the placement of the new bathtub. You’ll also want to think about your personal preferences and needs when it comes to the type of bathtub you choose, whether it’s a standard model, a deep soaking tub, or a whirlpool tub with additional jets. By taking the time to carefully consider these factors, you can ensure that your new bathtub is a perfect fit for your bathroom and your lifestyle.
Finding the Right Bathtub for Your Bathroom
When it comes to finding the right bathtub for your bathroom, there are a few key factors to consider. First and foremost, you’ll want to think about the size of your bathroom and how much space you have available. If you have a smaller bathroom, a compact bathtub or a corner bathtub may be a better fit. On the other hand, if you have a larger bathroom, you might have more flexibility when it comes to choosing a bathtub size and style.
In addition to size, you’ll also want to think about the style and design of the bathtub. There are a wide variety of options available, from traditional clawfoot tubs to modern freestanding tubs. Consider the overall aesthetic of your bathroom and choose a bathtub that complements the existing décor. It’s also important to think about the material of the bathtub.
Acrylic and fiberglass are popular choices as they are durable and easy to clean. Porcelain and cast iron are more traditional options that offer a classic look but require more maintenance. Ultimately, finding the right bathtub for your bathroom is all about finding the perfect balance between size, style, and functionality.
Measuring and Preparing the Space
When it comes to replacing your old bathtub, one of the first steps is to measure and prepare the space in your bathroom. This step is crucial in ensuring that your new bathtub will fit properly and that the installation process goes smoothly.
To begin, take accurate measurements of the area where your bathtub will be placed. Measure the length, width, and depth of the space to determine the appropriate size and style of bathtub that will fit best. Keep in mind any existing fixtures or features that may impact the placement of the new bathtub, such as windows or plumbing lines. Once you have measured the space, it is important to prepare it for the installation.
This may involve removing any existing tiles, flooring, or fixtures that could hinder the installation process. Clearing the area and ensuring that it is clean and level will help to create a solid foundation for your new bathtub. Additionally, if there are any structural issues or concerns, it is advisable to address them before proceeding with the installation.
By carefully measuring and preparing the space, you will be well on your way to successfully replacing your old bathtub. Taking the time to do this step correctly will help to ensure that your new bathtub fits perfectly and functions properly in your bathroom.
Removing the Old Bathtub
When it comes to renovating your bathroom, one of the key steps is removing the old bathtub. This task may seem daunting at first, but with the right tools and preparation, you can tackle it with ease. Before diving in, be sure to turn off the water supply to your bathroom and drain any remaining water from the bathtub. This will prevent any potential leaks or water damage during the removal process.
Once you have cleared the area around the bathtub, the next step is to disconnect the plumbing fixtures. This includes removing the showerhead, faucet handles, and any other attachments connected to the bathtub. This can typically be done with the help of a wrench or pliers, depending on the type of fixtures you have. Take your time with this step to avoid damaging the plumbing or causing any unnecessary headaches down the line. With the fixtures removed, you are now ready to start loosening the bathtub from its position and removing it from your bathroom.
Disconnecting the Plumbing Fixtures
When it comes to disconnecting the plumbing fixtures during a bathtub replacement, it is important to take certain steps to ensure a smooth and successful process. First, turn off the water supply to the bathroom. This can usually be done by shutting off the main valve located near the water meter. Then, drain any remaining water from the bathtub and surrounding pipes by opening the faucets and allowing the water to run out.
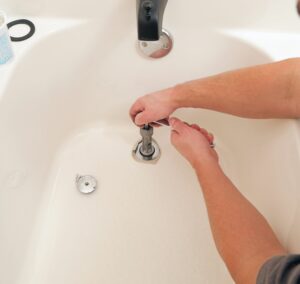
Next, it is time to disconnect the plumbing fixtures. Start by removing the drain cover and unscrewing the drain trap located underneath the tub. Use pliers or a wrench to loosen any connections, and carefully disconnect the water supply lines from the faucet handles and showerhead. If there are any additional fixtures, such as a hand shower or spray nozzle, disconnect them as well.
Remember to place a bucket or towel underneath the connections to catch any dripping water. It is also a good idea to label or take pictures of the plumbing connections before disconnecting them, as this will make the reconnection process much easier later on. By following these steps and taking necessary precautions, disconnecting the plumbing fixtures during a bathtub replacement can be a relatively straightforward task.
Installing the New Bathtub
When it comes to installing a new bathtub, there are a few key steps to consider. First, you’ll want to make sure you have all the necessary tools and materials on hand. This may include a level, a tape measure, a wrench, and caulking. It’s also important to carefully read and follow the manufacturer’s instructions for your specific bathtub model.
Before placing the new bathtub into the designated area, you’ll need to ensure that the area is clean and free from any debris. This will help to ensure a smooth installation process. You should also double-check the measurements of the space to ensure that the new bathtub will fit properly. Once you’re satisfied with the measurements, carefully lower the new bathtub into place and secure it according to the manufacturer’s guidelines. It’s important to take your time during this step to ensure that the bathtub is installed correctly and securely.
By following these steps, you’ll be well on your way to successfully installing your new bathtub. However, it’s important to note that this process can be challenging and may require some expertise. If you’re unsure about any aspect of the installation, it’s always a good idea to consult a professional to ensure that the job is done right.
Connecting the Plumbing Fixtures
When it comes to connecting the plumbing fixtures in your bathroom during a bathtub replacement project, there are a few important steps to follow. First, you’ll need to carefully inspect the plumbing connections and ensure that they are in good condition. This includes checking for any leaks or damage that may need to be addressed before proceeding.
Once you’ve confirmed that the plumbing connections are in good shape, you can begin the process of connecting the fixtures to the new bathtub. This typically involves attaching the water supply lines to the appropriate valves or faucets, as well as connecting the drain to the bathtub’s drainpipe. It’s essential to take your time during this step to ensure that all connections are tight and secure.
You may need to use a plumber’s tape or thread sealant to prevent any potential leaks. Once everything is properly connected, it’s a good idea to test the water flow and drainage to make sure everything is working as it should.
Sealing and Caulking the Edges
When it comes to installing a new bathtub, sealing and caulking the edges is a critical step that should not be overlooked. This process ensures that water and moisture are prevented from seeping into the gaps between the bathtub and the surrounding walls or floor. To begin, you’ll need to gather the necessary materials, such as a high-quality silicone caulk and a caulking gun.
Before applying the caulk, it is important to clean the area thoroughly to remove any dirt, debris, or old caulking that may be present. This can be done using a mild detergent and a sponge, followed by a thorough rinse and drying of the surface. Once the area is clean and dry, you can begin applying the caulk. Starting from one corner, carefully squeeze the caulk into the gap between the bathtub and the wall or floor. Use a steady hand and apply an even bead of caulk along the entire length of the gap.
Remember to work in small sections to ensure that the caulk does not dry out before you finish. Once the caulk has been applied, you can use a caulk smoothing tool or your finger to smooth and shape the caulk, ensuring a neat and professional finish. This step is essential not only for aesthetics but also to create a watertight seal. Allow the caulk to dry according to the manufacturer’s instructions before using the bathtub.
Sealing and caulking the edges of your new bathtub is an essential step that helps prevent water damage and ensures the longevity of your installation. By following these simple steps and taking the time to do it right, you can enjoy a leak-free bathtub that adds beauty and functionality to your bathroom.
Testing for Leaks and Making Final Adjustments
When it comes to installing a new bathtub, testing for leaks and making final adjustments is an important step to ensure that the installation is successful. After connecting all the plumbing fixtures and sealing the edges, it’s crucial to check for any leaks to prevent water damage and to ensure that everything is working as it should. To test for leaks, start by filling the bathtub with water.
Make sure to plug the drain and let the water fill up to a reasonable level. While the tub is filling, inspect the surrounding areas for any signs of leakage, such as dampness or water stains. Pay attention to the edges, the drain, and the faucet connections. If you notice any leaks, turn off the water supply and address the issue before proceeding further.
Once you’ve verified that there are no leaks, it’s time to make final adjustments to ensure the bathtub is functioning properly. Test the faucet and handles to ensure that they turn on and off smoothly and that the water temperature is adjustable. Check the drain to see if it is draining properly, and adjust it if necessary.
Additionally, make sure that the bathtub is level and stable. If there are any adjustments needed, now is the time to make them. Testing for leaks and making final adjustments may seem like minor tasks, but they are crucial for a successful bathtub installation. By taking the time to do these checks, you can ensure that your new bathtub will provide you with many years of enjoyment without any unexpected issues. So don’t rush through this step, and take the time to make sure everything is in perfect working order.
Transform Your Bathroom with Confidence: Choose ASAP Plumbing Experts for Your Bathtub Replacement
Are you ready to say goodbye to your old, worn-out bathtub and welcome a new era of comfort and style in your bathroom? At ASAP Plumbing Experts, we’re here to make your bathtub replacement process as seamless and stress-free as possible. With our expert team by your side, you can rest assured that every step, from removing the old tub to installing and sealing the new one, is handled with precision and care. Contact us now and take the first step towards a beautiful, functional, and leak-free bathtub that you’ll love for years to come.